Create an AI Voice-Over in minutes

Step by step: upload your file, pick a voice (global, per line, or via “Manage Speakers”), choose text source & timing, export.

Quick overview
  • Upload → open Voice Studio
  • Pick a voice (global / per line / per speaker)
  • “Create AI-Voice Video/Audio” → source & timing
  • Download
1

Upload & open Voice Studio

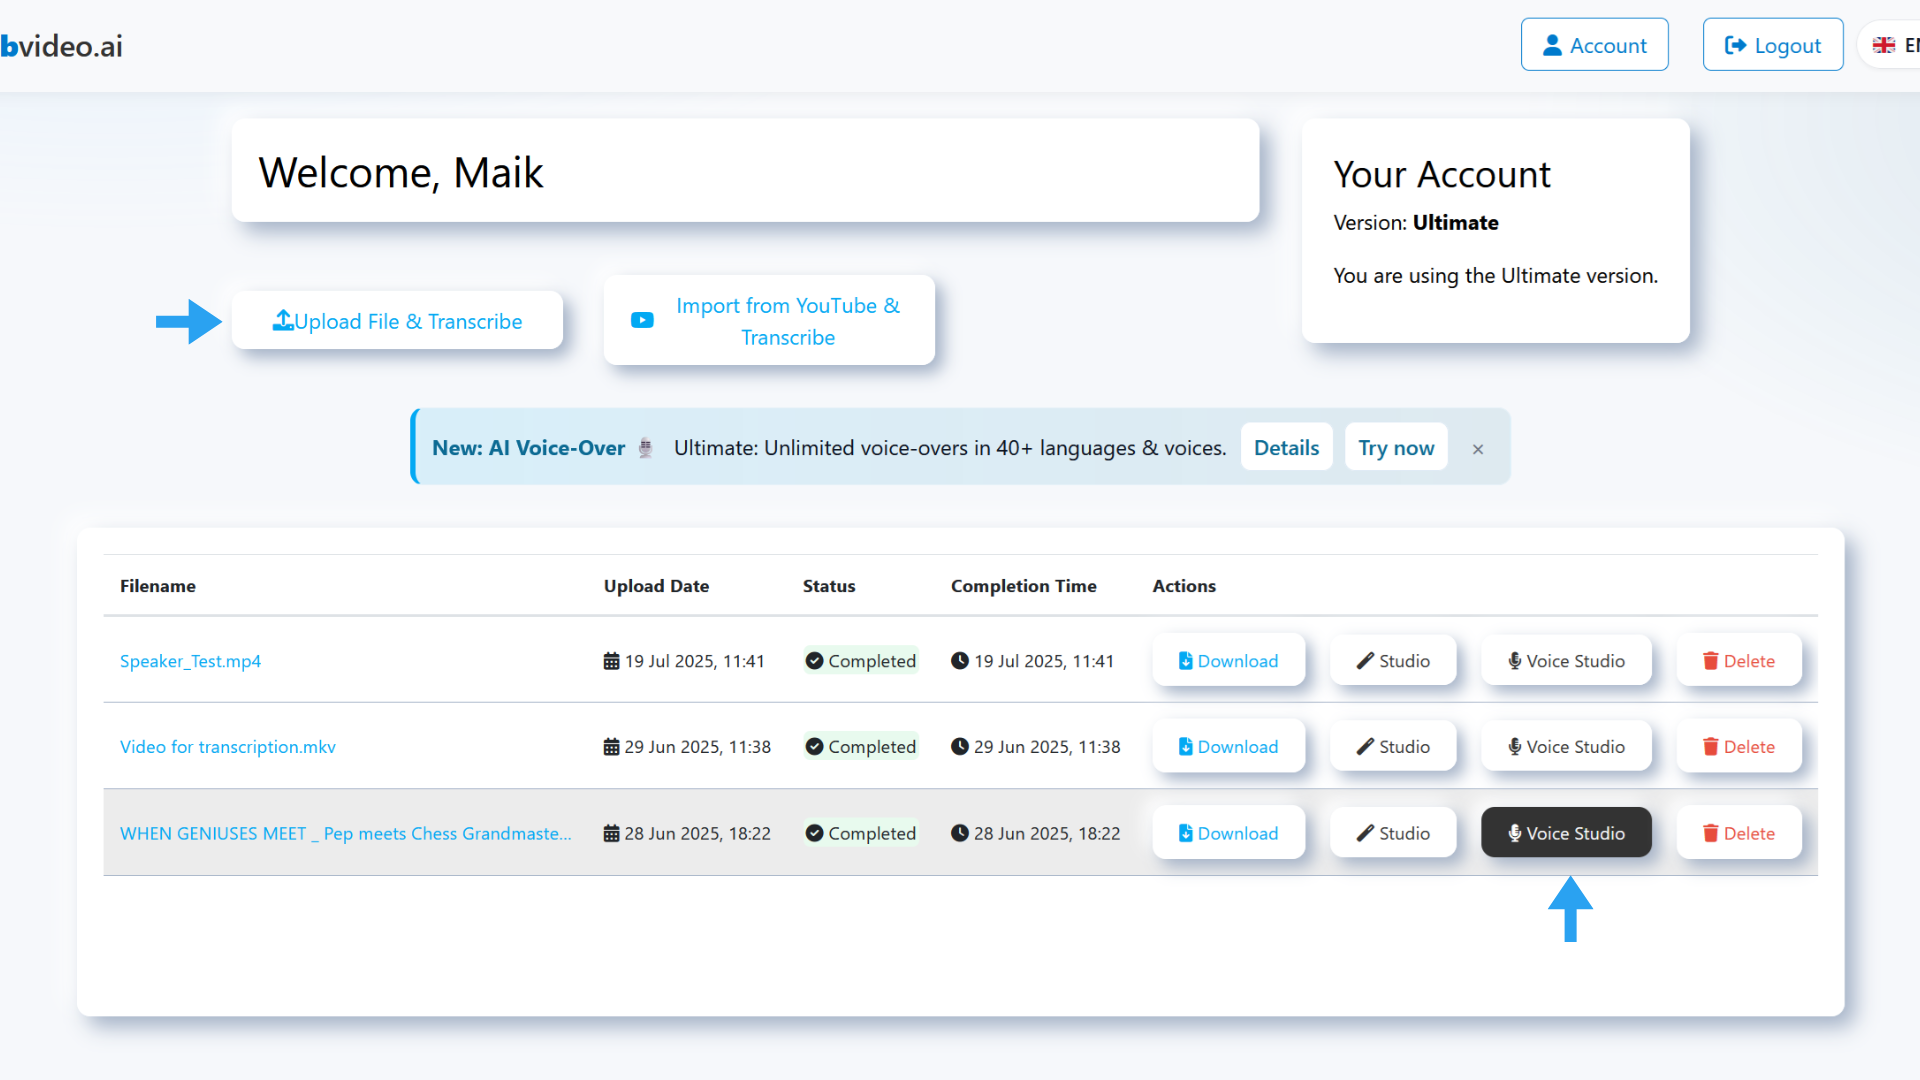
  1. Open Dashboard and click Upload.
  2. Choose a file and (optional) enable Speaker Recognition.
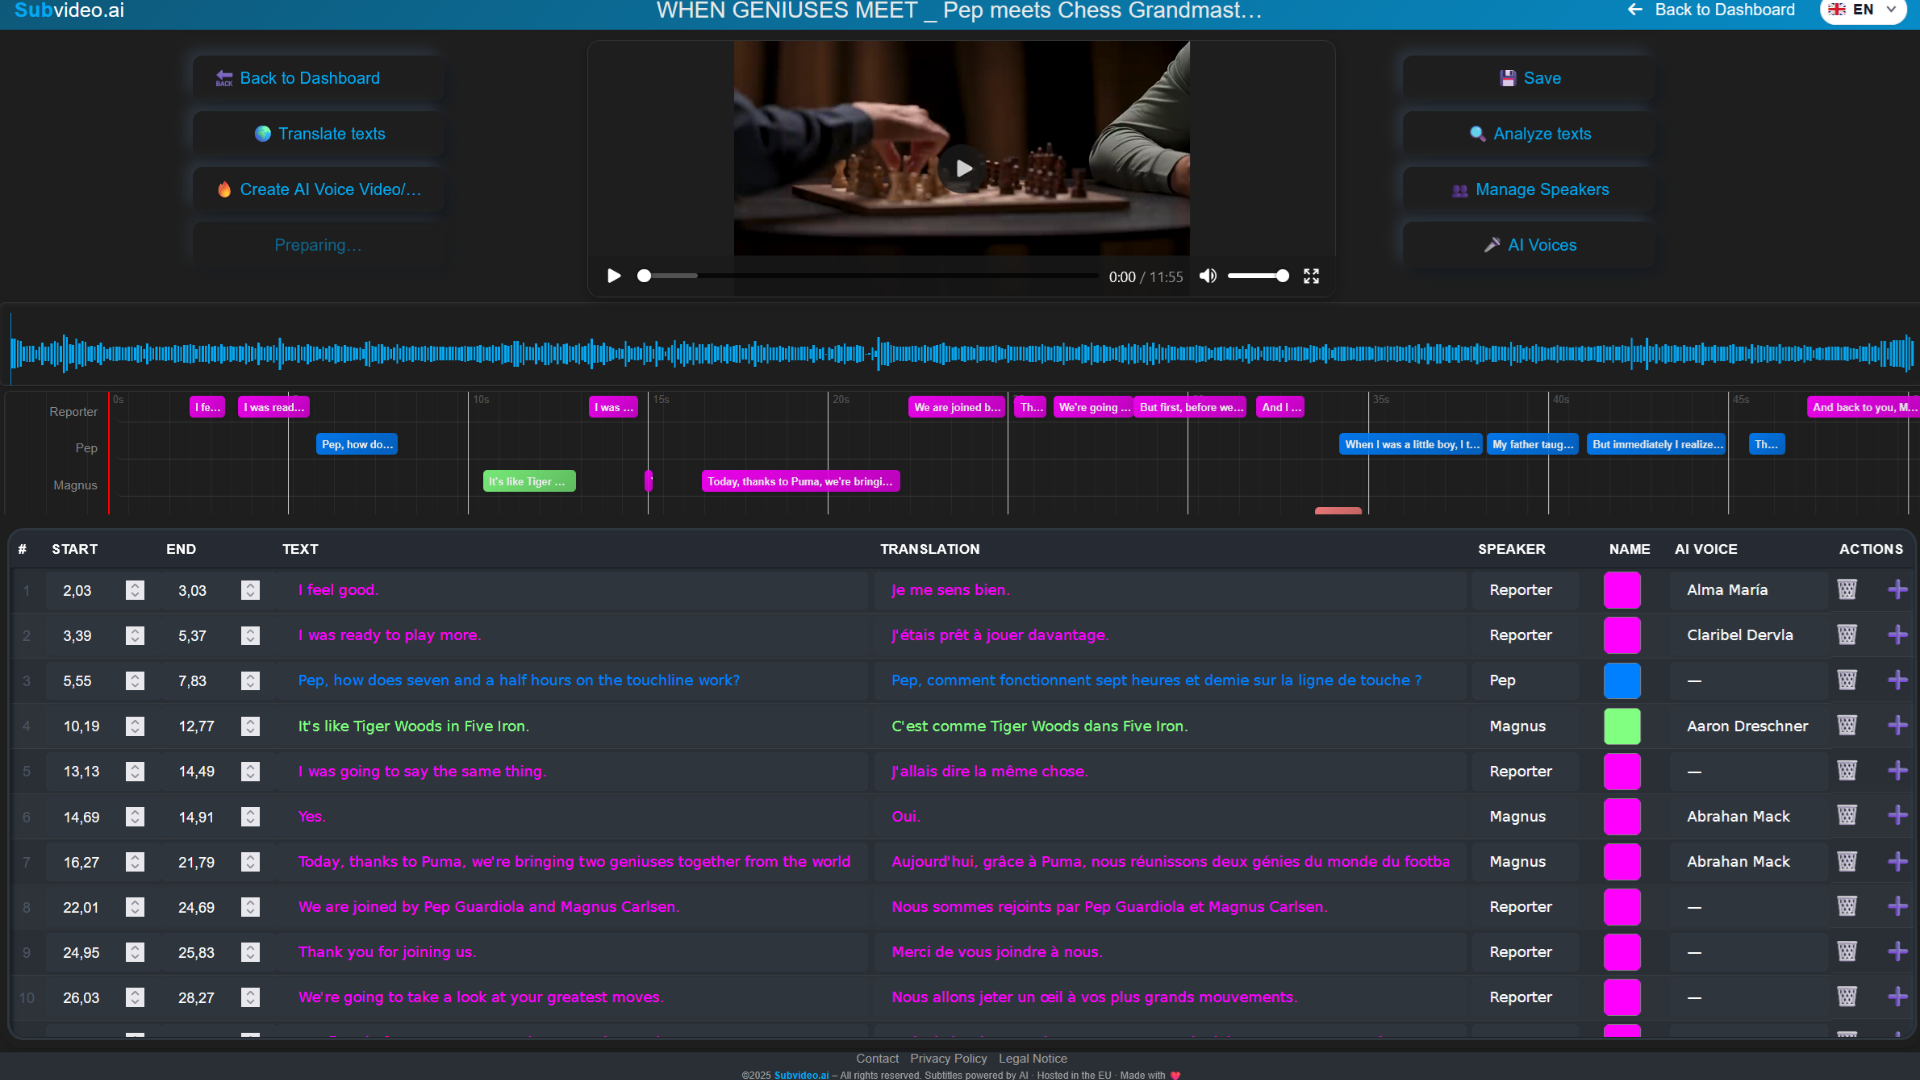
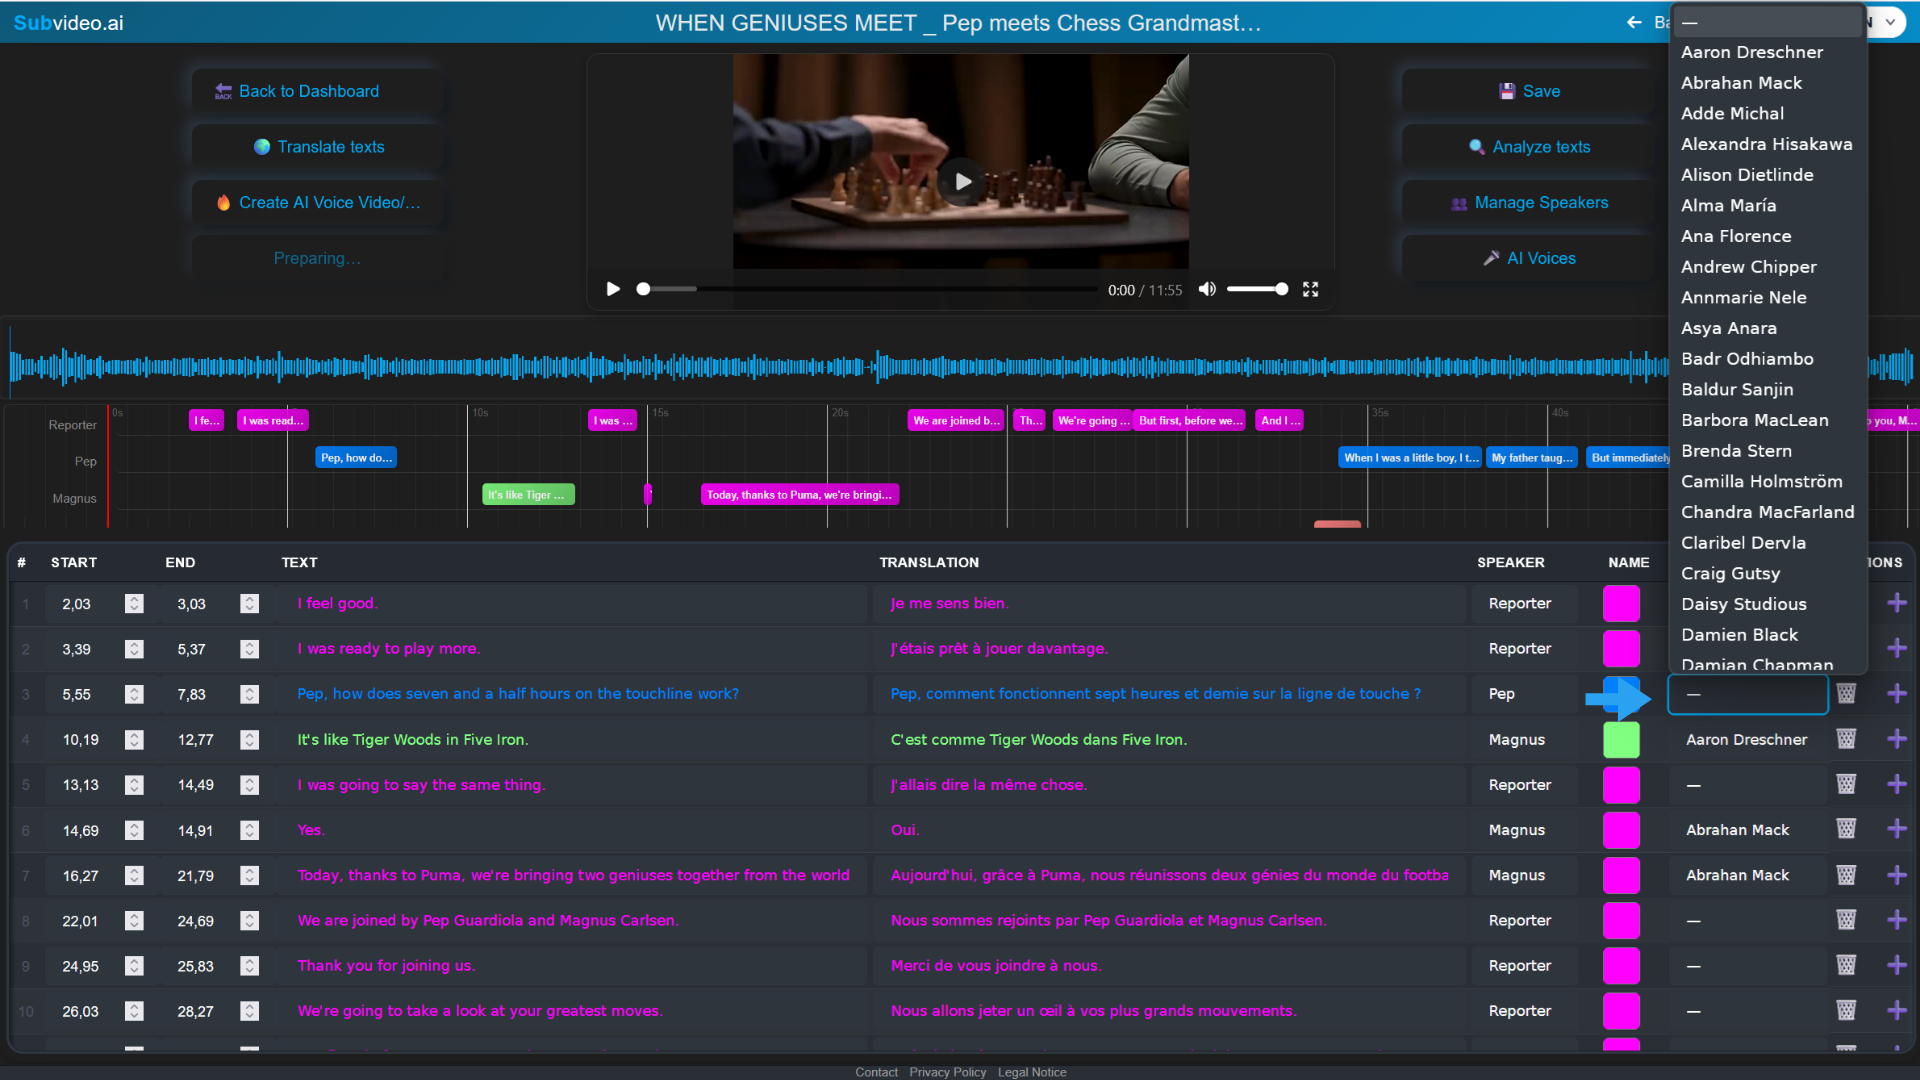
  3. After upload, click “Voice Studio” on your file.
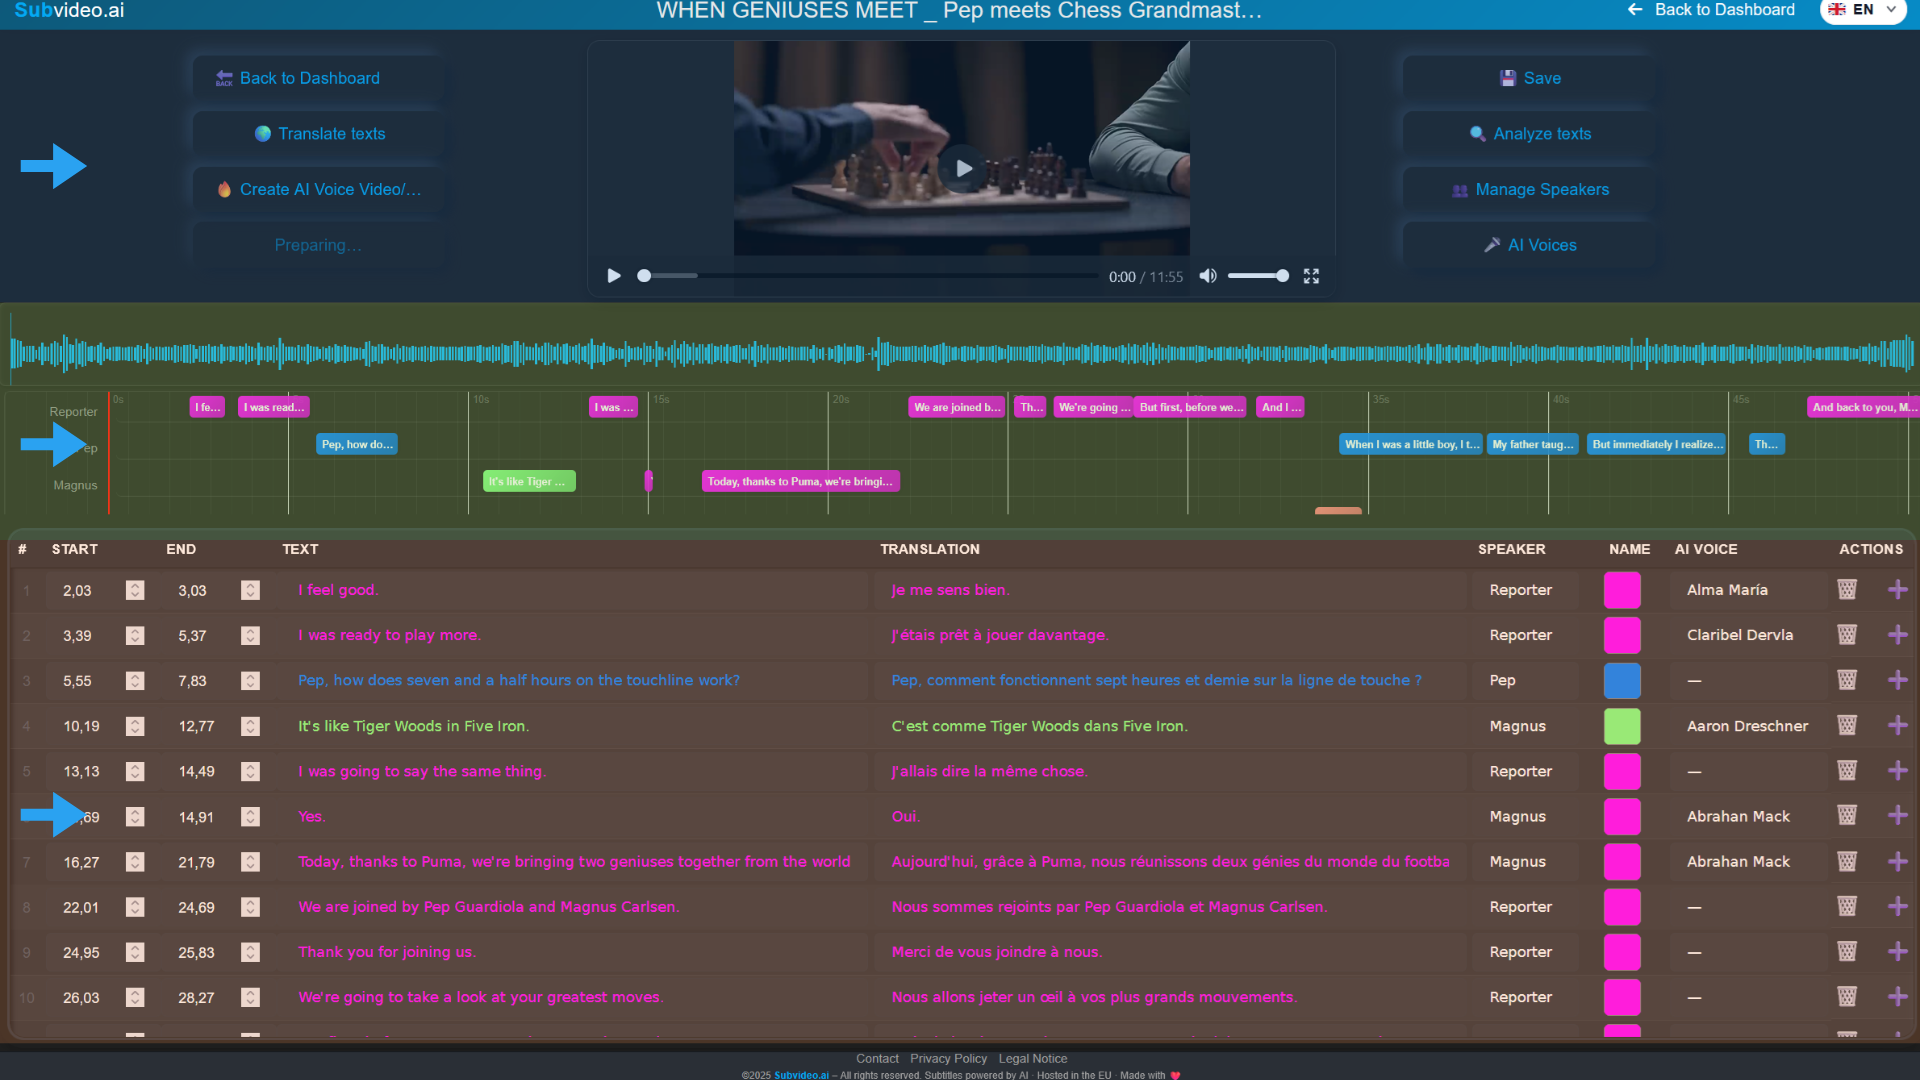
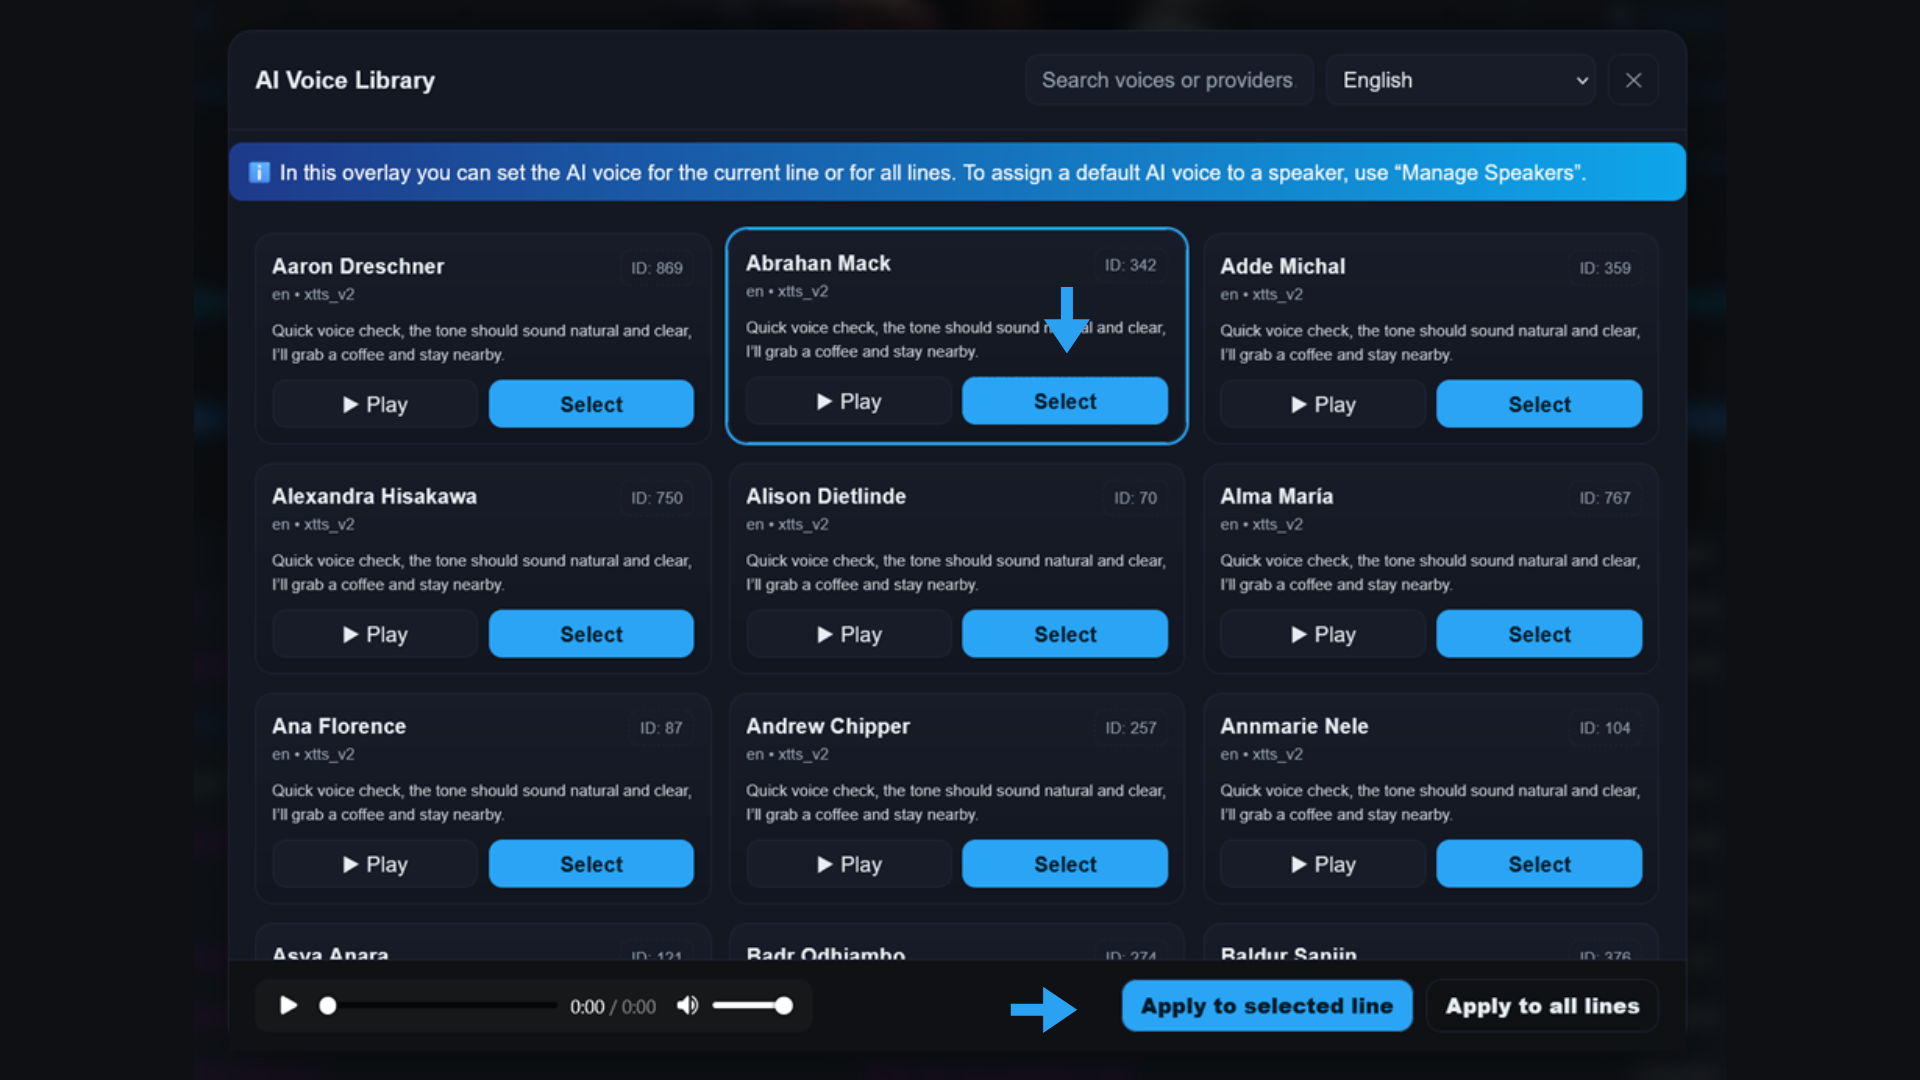
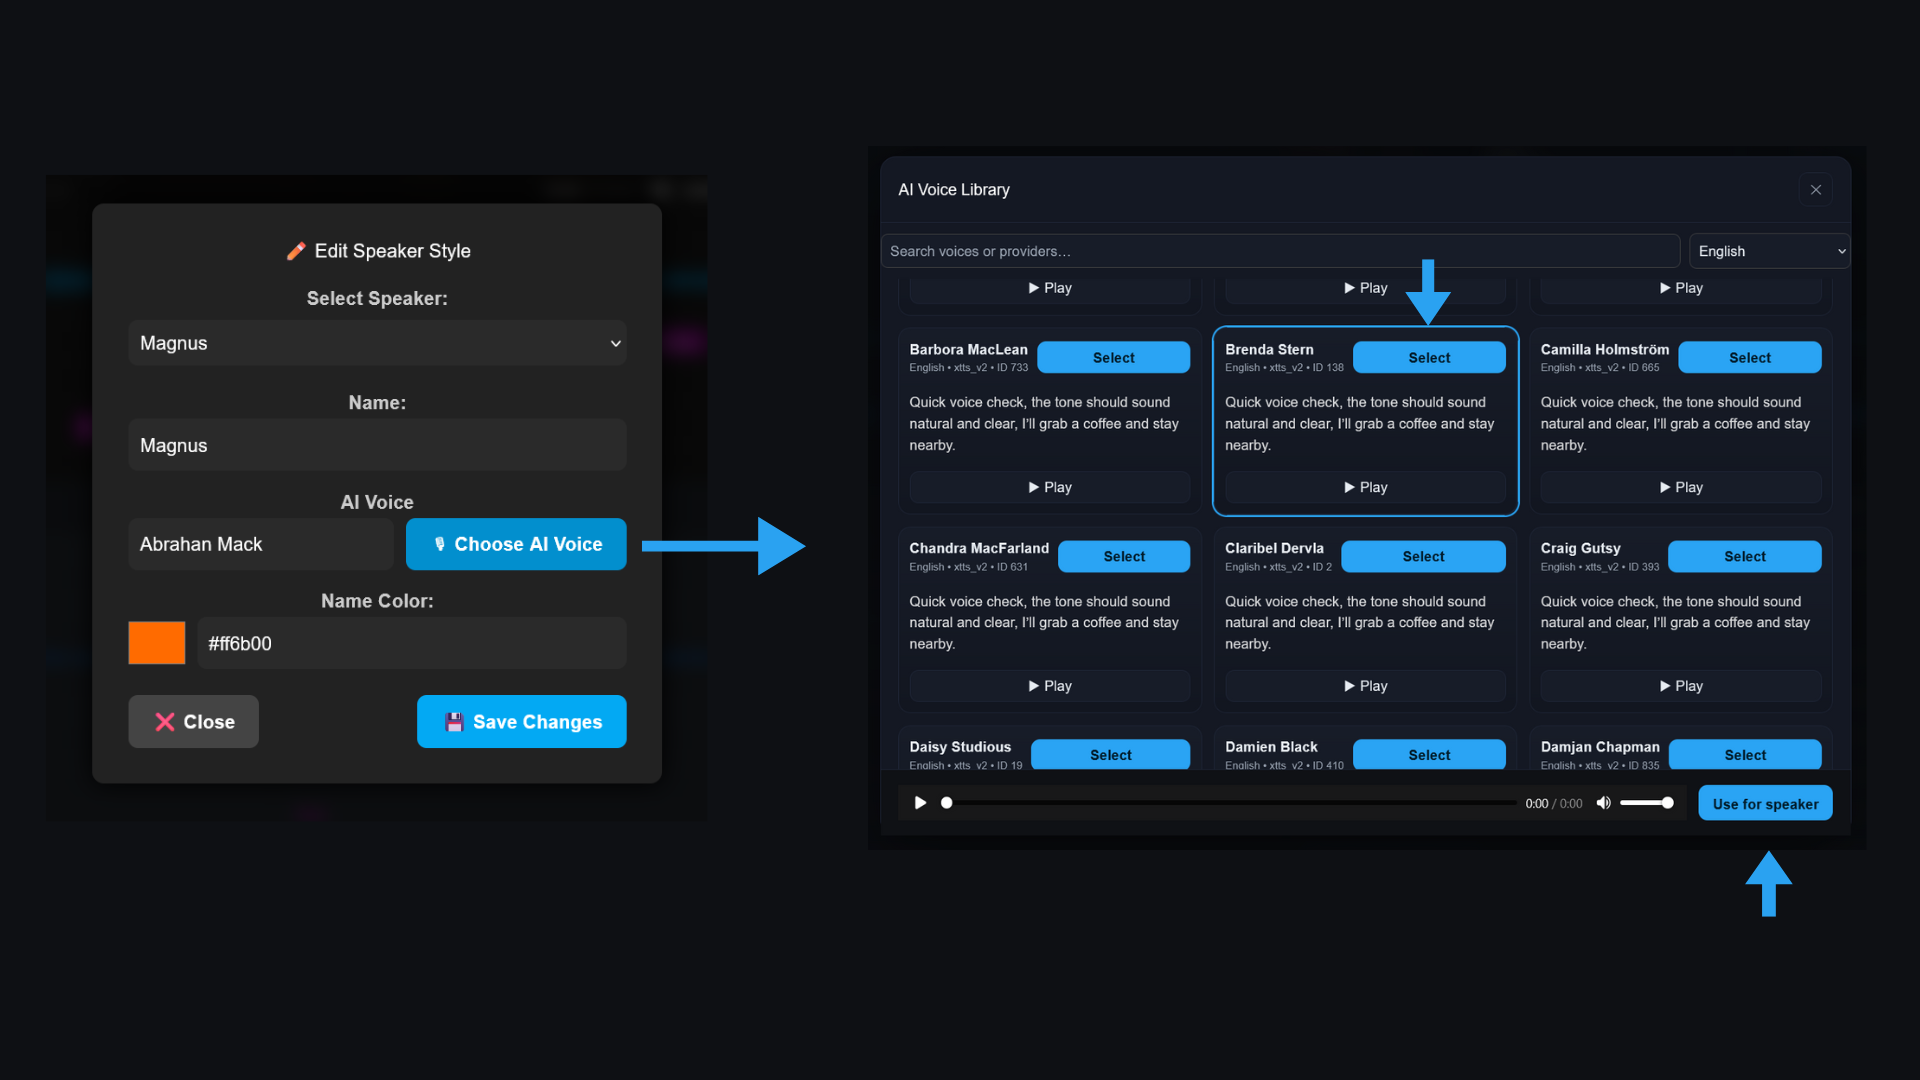
Tip: with speaker recognition enabled you can auto-assign an AI voice per speaker later.
Dashboard with “Voice Studio” button
Voice Studio overview with player, timeline and table
Top: player & timeline; bottom: table with text & settings.
2

Orientation in Voice Studio

  • Top bar: AI Voices, Manage Speakers, Create AI-Voice Video/Audio, Export
  • Player & timeline: blocks per line/speaker; player stays visible.
  • Table: columns Text, Translated, Speaker, AI Voice … — inline editable.
Marked key areas and buttons
Marked key areas and buttons.
3

Pick a voice – three ways

A) One voice for all lines

  1. Open AI Voices.
  2. Pick a voice and preview it.
  3. Click “Apply to all lines”.
Voice library with search, categories and apply button
Search, categories, previews, apply button.

B) Different voices per line

  1. In the table, open the AI Voice cell of the target line.
  2. Pick a voice — only this line changes.
Per-line voice dropdown
Per-line dropdown of available voices.

C) Via “Manage Speakers”

  1. Open Manage Speakers.
  2. Assign an AI voice per speaker or edit one.
  3. Set the speaker in the table → voice is auto-applied.
Note: existing lines without a voice also adopt the assigned AI voice when you change the speaker.
Per-speaker settings for name, color/style and AI voice
Set name, color/style and AI voice per speaker.
4

Translate & edit lines

  1. Edit inline in Text or Translated.
  2. Use the translate function to fill Translated automatically.
  3. Polish names, numbers, punctuation, short sentences for better rhythm.
Example: auto translation and manual edits
Example with manual tweaks and auto-translation.
5

Create AI-Voice: source & timing

  1. Click “Create AI-Voice Video/Audio”.
  2. Choose text source: Original or Translated.
  3. Timing modes:
  • Natural — most human prosody (can deviate slightly from subtitle window).
  • SRT-Fit — fits each line exactly into its subtitle window (frame-accurate, a bit more technical).
Choose source & timing
Choose text source & timing.
Render status during processing
Status/Progress while rendering.
Recommendation: use Natural for social & creative edits; use SRT-Fit for strict subtitle mastering workflows.
6

Download & versions

After finishing you can download Video (voice-over embedded) or Audio-only. You can re-render anytime (different voice, source, timing).

Download Video/Audio
Download video/audio.

Practical workflows

⚡ Quick-start (one speaker, one voice)

  1. Upload → open Voice Studio.
  2. AI Voices → pick voice → Apply to all lines.
  3. Create → source & timing → download.

🎭 Dialog dubbing (multiple speakers)

  1. Upload with Speaker Recognition (or create speakers manually).
  2. Manage Speakers → assign voice per speaker.
  3. Set the speaker per line (voice auto-applies).
  4. Create & download.

🎨 Creative mode (vary per line)

  1. Set different AI Voice in selected lines.
  2. Tweak translations per line if needed.
  3. Render, listen, iterate.
!

Troubleshooting

  • Voice doesn’t change: check the AI Voice column; in Manage Speakers assign the voice first, then set the speaker in the line.
  • Text too long for window: shorten it or switch to Natural; with SRT-Fit split long lines.
  • Output sounds choppy: shorter sentences, add pauses ("…"), use Natural timing.
  • Only one voice audible with multiple speakers: check assignments in Manage Speakers and the speaker column.
  • No download visible: reload page; ensure the job finished; check browser extensions.
If a render job fails: test with few lines, check file size, ensure a stable connection.
?

FAQ

Audio-only? Yes — choose Audio-only when downloading.

Natural vs. SRT-Fit? Natural = best sound; SRT-Fit = strictly fits subtitle windows.

Switch method later? Anytime — fields remain editable.

Mix original & translated? Yes — choose the desired source when creating.

Ready? Start your Voice-Over 🚀

Open your project in Voice Studio and follow the step-by-step guide.